
因為 LINE Notify 要沒了。
這不太算保母級教學,這裡假設你已會使用 LINE Notify,在考慮換成 Telegram 的,極其簡易的用例。
涵蓋#
事先預告,這裡只涵蓋:
- Python
- 文字
- 圖片
- Curl
- 文字
建立機器人#
- 在 Telegram 內搜尋
@BotFather,加它好友,它是官方建立機器人的機器人
@BotFather- 傳送
/start訊息給它,或 UI 可能有 start 按鈕讓你按 - 點選 Menu 或選單,選擇 /newbot create a new bot
- 然後它就會問你機器人要取什麼名字,在此為
XLion Webhook test 2 - 接者是使用者名稱,這裡規定必須以 “bot” 結尾,在此為
xlion_webhook2_bot - 然後最後它就會給你 API Token
對話內容看起來像這樣:
/newbot
Alright, a new bot. How are we going to call it? Please choose a name for your bot.
XLion Webhook test 2
Good. Now let’s choose a username for your bot. It must end in `bot`. Like this, for example: TetrisBot or tetris_bot.
xlion_webhook2_bot
Done! Congratulations on your new bot. You will find it at t.me/xlion_webhook2_bot. You can now add a description, about section and profile picture for your bot, see /help for a list of commands. By the way, when you’ve finished creating your cool bot, ping our Bot Support if you want a better username for it. Just make sure the bot is fully operational before you do this.
Use this token to access the HTTP API: 8158068843:AAEoTMNzo5dWuHBvE3UGzBpOWAgf7gMQSJE Keep your token secure and store it safely, it can be used by anyone to control your bot.
For a description of the Bot API, see this page: https://core.telegram.org/bots/api
日後使用此機器人時,API 請求格式為:
https://api.telegram.org/bot<token>/METHOD_NAME在此我帶入我的 Token,那就是
https://api.telegram.org/bot8158068843:AAEoTMNzo5dWuHBvE3UGzBpOWAgf7gMQSJE/METHOD_NAME測試#
首先可先測試 Token 是否能正常運作,官方範例:
https://api.telegram.org/bot123456:ABC-DEF1234ghIkl-zyx57W2v1u123ew11/getMe在此我帶入我的 Token,並使用 curl 進行 GET 請求:
curl https://api.telegram.org/bot8158068843:AAEoTMNzo5dWuHBvE3UGzBpOWAgf7gMQSJE/getMe回傳格式是 JSON,不過是沒有排列過的,可透過在指令尾加入 | jq 讓它幫我們美化回傳的 JSON 結果,增加可讀性,範例輸出:
後面所有範例輸出皆會經由 jq 處理
{
  "ok": true,
  "result": {
    "id": 8158068843,
    "is_bot": true,
    "first_name": "XLion Webhook test 2",
    "username": "xlion_webhook2_bot",
    "can_join_groups": true,
    "can_read_all_group_messages": false,
    "supports_inline_queries": false,
    "can_connect_to_business": false,
    "has_main_web_app": false
  }
}
可以看到
"ok"是true"first_name"包含了剛剛所取的名字"username"包含了剛剛所指定的使用者名稱
取得 chat_id#
在此之前,請先加剛剛建立的機器人的好友,如果你是想要讓它推訊息到群組,那也把它加進那個群組。
添加方法: 搜尋 @ + 剛剛設定的機器人使用者名稱,加它好友,在此為 @xlion_webhook2_bot
然後用 getUpdates 這個 Method 來 get API
curl https://api.telegram.org/bot8158068843:AAEoTMNzo5dWuHBvE3UGzBpOWAgf7gMQSJE/getUpdates只有一個人加好友的範例輸出:
{
  "ok": true,
  "result": [
    {
      "update_id": 94007883,
      "message": {
        "message_id": 1,
        "from": {
          "id": 123456789,
          "is_bot": false,
          "first_name": "(redacted)",
          "last_name": "(redacted)",
          "username": "(redacted)",
          "language_code": "zh-hans"
        },
        "chat": {
          "id": 123456789,
          "first_name": "(redacted)",
          "last_name": "(redacted)",
          "username": "(redacted)",
          "type": "private"
        },
        "date": 1738838821,
        "text": "/start",
        "entities": [
          {
            "offset": 0,
            "length": 6,
            "type": "bot_command"
          }
        ]
      }
    }
  ]
}
因為只有一個人(也就是我)加它好友,所以很好找,輸出會顯示你的帳號名稱以及使用者名稱,旁邊的 "id" 就是我們要找的 chat_id,先記下它。
接下來,我建立了個群組,叫 “XLion Webhook test Group 2”,並把它加進去了:
{
  "ok": true,
  "result": [
    {
      "update_id": 94007883,
      "message": {
        "message_id": 1,
        "from": {
          "id": 123456789,
          "is_bot": false,
          "first_name": "(redacted)",
          "last_name": "(redacted)",
          "username": "(redacted)",
          "language_code": "zh-hans"
        },
        "chat": {
          "id": 123456789,
          "first_name": "(redacted)",
          "last_name": "(redacted)",
          "username": "(redacted)",
          "type": "private"
        },
        "date": 1738838821,
        "text": "/start",
        "entities": [
          {
            "offset": 0,
            "length": 6,
            "type": "bot_command"
          }
        ]
      }
    },
    {
      "update_id": 94007884,
      "my_chat_member": {
        "chat": {
          "id": -4702845416,
          "title": "XLion Webhook test Group 2",
          "type": "group",
          "all_members_are_administrators": true
        },
        "from": {
          "id": 123456789,
          "is_bot": false,
          "first_name": "(redacted)",
          "last_name": "(redacted)",
          "username": "(redacted)",
          "language_code": "zh-hans"
        },
        "date": 1738839552,
        "old_chat_member": {
          "user": {
            "id": 8158068843,
            "is_bot": true,
            "first_name": "XLion Webhook test 2",
            "username": "xlion_webhook2_bot"
          },
          "status": "left"
        },
        "new_chat_member": {
          "user": {
            "id": 8158068843,
            "is_bot": true,
            "first_name": "XLion Webhook test 2",
            "username": "xlion_webhook2_bot"
          },
          "status": "member"
        }
      }
    },
    {
      "update_id": 94007885,
      "message": {
        "message_id": 2,
        "from": {
          "id": 123456789,
          "is_bot": false,
          "first_name": "(redacted)",
          "last_name": "(redacted)",
          "username": "(redacted)",
          "language_code": "zh-hans"
        },
        "chat": {
          "id": -4702845416,
          "title": "XLion Webhook test Group 2",
          "type": "group",
          "all_members_are_administrators": true
        },
        "date": 1738839552,
        "new_chat_participant": {
          "id": 8158068843,
          "is_bot": true,
          "first_name": "XLion Webhook test 2",
          "username": "xlion_webhook2_bot"
        },
        "new_chat_member": {
          "id": 8158068843,
          "is_bot": true,
          "first_name": "XLion Webhook test 2",
          "username": "xlion_webhook2_bot"
        },
        "new_chat_members": [
          {
            "id": 8158068843,
            "is_bot": true,
            "first_name": "XLion Webhook test 2",
            "username": "xlion_webhook2_bot"
          }
        ]
      }
    }
  ]
}
目光看向這裡:
"chat": {
    "id": -4702845416,
    "title": "XLion Webhook test Group 2",
    "type": "group",
    "all_members_are_administrators": true
}
這裡減號 “-” 開頭的就是這個群組的 chat_id (包含減號!)
這裡有了 chat_id 就可以指定接收對象了,下一步開始發送
Curl#
文字#
首先 Curl,它最單純,系統一定都有,讓我們 POST API,並附帶兩條 JSON 內容:
- 首先網址為
"https://api.telegram.org/bot<token>/sendMessage - 第一條內容為
chat_id - 第二條內容為實際要發送的文字訊息 (text)
範例輸入:
curl -X POST "https://api.telegram.org/bot8158068843:AAEoTMNzo5dWuHBvE3UGzBpOWAgf7gMQSJE/sendMessage" \
     -d "chat_id=-4702845416" \
     -d "text=這是一條 Hello 訊息"
範例輸出:
{
  "ok": true,
  "result": {
    "message_id": 4,
    "from": {
      "id": 8158068843,
      "is_bot": true,
      "first_name": "XLion Webhook test 2",
      "username": "xlion_webhook2_bot"
    },
    "chat": {
      "id": -4702845416,
      "title": "XLion Webhook test Group 2",
      "type": "group",
      "all_members_are_administrators": true
    },
    "date": 1738840572,
    "text": "這是一條 Hello 訊息"
  }
}
我們可以看到 "ok" 是 true 代表 API 說此操作執行成功,沒有錯誤
要換行怎麼辦#
你會發現 \n 沒用,無法被轉譯為換行符號,所以加 %0A
這是換行符號的意思
curl -X POST "https://api.telegram.org/bot8158068843:AAEoTMNzo5dWuHBvE3UGzBpOWAgf7gMQSJE/sendMessage" \
     -d "chat_id=-4702845416" \
     -d "text=這是一條 Hello 訊息%0A第二條 Hello"
範例輸出:
{
  "ok": true,
  "result": {
    "message_id": 7,
    "from": {
      "id": 8158068843,
      "is_bot": true,
      "first_name": "XLion Webhook test 2",
      "username": "xlion_webhook2_bot"
    },
    "chat": {
      "id": -4702845416,
      "title": "XLion Webhook test Group 2",
      "type": "group",
      "all_members_are_administrators": true
    },
    "date": 1738841057,
    "text": "這是一條 Hello 訊息\n第二條 Hello"
  }
}
可以看到 %0A 最終有成為 \n
實際上,你可以直接把事先準備好的 JSON 檔案送出去,這裡不詳述,見:
https://stackoverflow.com/questions/34847981/curl-with-multiline-of-json/75585187#75585187
Python#
文字#
直接使用 requests 發送 JSON 資料到 API,requests 幾乎所有 Python 安裝都會附帶,其中的 import json 是第二條 print,所需要的,它們兩個的差別在於第二個有類似 jq 整理 JSON 的效果,可根據需要選擇
Code:
import requests
import json

TOKEN = "8158068843:AAEoTMNzo5dWuHBvE3UGzBpOWAgf7gMQSJE"
CHAT_ID = "-4702845416"  # 替換為你的群組 chat ID
MESSAGE = "這是第一行的 Hello\n這是第二行的 Hello\n這是第三行的 Hello"

url = f"https://api.telegram.org/bot{TOKEN}/sendMessage"
data = {
    "chat_id": CHAT_ID,
    "text": MESSAGE
}

response = requests.post(url, data=data)
print(response.json())  # 檢查回應是否成功
print(json.dumps(response.json(), indent=4, ensure_ascii=False))
範例輸出:
{'ok': True, 'result': {'message_id': 8, 'from': {'id': 8158068843, 'is_bot': True, 'first_name': 'XLion Webhook test 2', 'username': 'xlion_webhook2_bot'}, 'chat': {'id': -4702845416, 'title': 'XLion Webhook test Group 2', 'type': 'group', 'all_members_are_administrators': True}, 'date': 1738841993, 'text': '這是第一行的 Hello\n這是第二行的 Hello\n這是第三行的 Hello'}}{
"ok": true,
"result": {
"message_id": 8,
"from": {
"id": 8158068843,
"is_bot": true,
"first_name": "XLion Webhook test 2",
"username": "xlion_webhook2_bot"
},
"chat": {
"id": -4702845416,
"title": "XLion Webhook test Group 2",
"type": "group",
"all_members_are_administrators": true
},
"date": 1738841993,
"text": "這是第一行的 Hello\n這是第二行的 Hello\n這是第三行的 Hello"
}
}可以看到,換行符號 \n 在 Python 可以被正確轉譯。
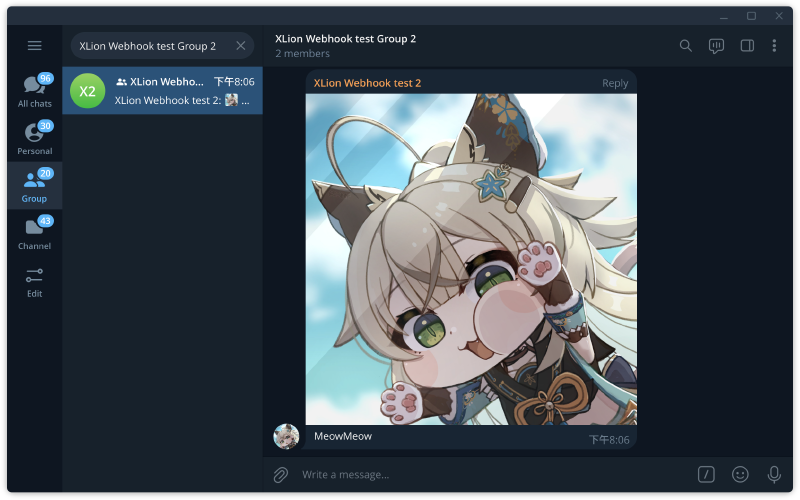
圖片#
需要依賴:python-telegram-bot (PyPI)
pip install python-telegram-botCode:
from telegram import Bot # pip install python-telegram-bot
import asyncio

TOKEN = "8158068843:AAEoTMNzo5dWuHBvE3UGzBpOWAgf7gMQSJE"
CHAT_ID = "-4702845416"
PHOTO_PATH = "meow.jpg" # 影像檔案名稱

async def send_photo():
    bot = Bot(token=TOKEN)
    with open(PHOTO_PATH, "rb") as photo:
        await bot.send_photo(chat_id=CHAT_ID, photo=photo, caption="MeowMeow")

asyncio.run(send_photo())
這套件似乎只能用 async 才能跑。
caption 就是影像描述,也就是隨著影像一起傳出去的文字。
改機器人頭貼、名字或刪除等#
回到 @BotFather 機器人,選擇 /mybots edit your bots,選擇要操作的機器人
- 選擇
Delete Bot可刪除機器人 - 選擇
Edit Bot可以變更設定,可以編輯- 名稱
- 編輯自介(About)
- 簡介(Description),第一次使用機器人時顯示「這個機器人可以做什麼」的說明訊息
- 頭貼(Botpic)